Showing posts with label interior. Show all posts

Updating Our Home For 2020


AD - This is a PR collaboration.

If you know me or follow the blog, you will already know that five years ago we were fortunate enough to get our foot on the property ladder - buying our first family home. After the initial purchase, we spent years renovating the house, literally, from top to bottom - most rooms were stripped back to brick. It was certainly a labour of love and something which took a lot longer than anticipated. Once all the DIY was out the way it was then time to focus on the interiors and that is when the fun truly began.

Fast forward five years, 2020 is here and with the new year and a new decade comes a lot of changes in our house, both big and small - and our first change is right around the corner with an interior revamp. Out with the old, and in with the new - this is what I've been waiting for. I have my heart set on a couple of decor and furniture pieces that will really spark some joy into my life and my home - I cannot wait to get started and show you what I've been looking at.


First on my list is the Melo 2 sofa from BoConcept Scotland - can you believe this two-seater has a reclining and sleeping function too? This makes it an ideal option for when family comes to visit or for when the kids want to have a sleepover downstairs. The chic grey colour is classic, ageless, and I think the Opart plaid throw with a couple of scatter cushions would make it pop even more. It's number one on my list for good reason - I adore it.


The Philadephia coffee table is another piece that I have my heart set on - just look at it! It's practical and aesthetically pleasing with its almost geometric shapes and contrasting dimensions. It would look perfect in the same room as the Melo 2 sofa and I can just picture it in my living room right now.

Do you have any home interior ideas up your sleeve for the new year? Could you imagine these pieces in your home? Perhaps you have any interior tips you would like to share with me?

Our home: Home decor haul


With most of the house renovations now out of the way I've finally been able to focus more on home decor. This means one thing... shopping! To be honest I'm not usually a 'shop to you drop' kind of gal but shopping for home decor is the only exception, I love it!

Here are some of the pieces that we have bought recently;

Night light from Rose & Grey. I recently won a £50 voucher to spend at the fabulous Rose & Grey and decided to spend it on Noah. I bought him this super cute night light and a little wooden chair for his bedroom.

Shabby chic inspired vase from Feather & Black. Not sure where this is going to go yet but I adore it.

Scented candle from B&M. I'm a secret candle hoarder and my Mum recently bought me this candle as a little house warming gift. Isn't it lovely?

Vintage look wall clock from Morrisons. I actually bought this a while back but it's only just gone up on the wall so it feels new! I think it suits my kitchen perfectly.

Kitchen sign from B&M. Can you believe this sign was just £1?! Another addition to our kitchen decor. 

This haul is all from B&M and all for under £50. The cushions and lamps have gone up into our bedroom while the rug and laundry basket (temporary toy box) is in our living room. 

As you can tell from by buys I shop everywhere for decor pieces. From bargain stores, to supermarkets and online boutiques. It really pays to shop around for the best price and don't settle for the first thing you set eyes on.

Where are your favourite places to shop for homeware? 


- I was not sent any of these products for review or reimbursed for featuring any stores mentioned. 

Our home: The master bedroom

Our bedroom is one of the rooms in the house that is totally finished now, minus a bit of furniture and decor. It's one of the rooms that I feel we spent ages on as it was the first room we began stripping and a room that we've dipped in and out of as our renovation progressed. 

It was probably one of the easier rooms to renovate too. We of course stripped the dated floral wallpaper and retro green carpet as soon as we bought the house. The room needed new plaster here and there but other than that the walls were fine. The ceiling was then lowered, plastered and spot lights were installed (something that I wasn't really bothered about but Nick prefers spot lights over one main light.) We also had new electrics and central heating installed as that was needed throughout the entire house. The new central heating and electrical rewiring was so expensive and cost almost half of our renovation budget. Which is very daunting when you still have a new bathroom, kitchen and a dozen other things yet to pay for! 

After all the big jobs were completed it was time for the fun part, the decorating. We first painted the ceiling white and it took a few coats as fresh plaster loves to soak up paint. Then we decorated the room with lining paper and painted with a Dulux shade called Mellow Mocha. It's a strange colour because in some light it can appear to have purple hue's and others it's the taupe type shade we were looking for. The light rail, skirting board, door, door frame, window frame, window sill then had a couple of layers of undercoat and gloss. 

With all the messy DIY and decorating jobs out of the way we then had to decide on a carpet. We decided to go for a silver grey (which is bang on trend according to our carpet fitter!) as I thought it would really compliment the colour and decor of the room. 

Here is our bedroom renovation journey from start to finish, enjoy! 


Our home: Noah's Nursery


We have been renovating our house for the past 5 months and everything is finally coming together. We weren't very sensible when it came to starting the work as instead of starting one room at a time we dived in and started every room, all at once. If I was to do this all over again I would certainly undertake one room at a time. Doing so much at once doesn't get you very far and it can leave you feeling deflated. It's been a long and slow process and I can't even begin to describe how good it feels to be almost at that finish line. 

I thought I would share with you some photo's from the work we have done in Noah's room. To say it's one of the smaller rooms in the house it sure took a lot of work!

We initially stripped all the walls in this room which took a long time to do because the previous owner had used some pretty old school wallpaper paste! We spent a good few days doing that but it was all to no avail. In the end we needed to start from scratch with the walls as they were in such bad condition (got to love old houses for that). That meant we needed to knock off all the plaster which isn't just hard work but dusty work too. Once we had done that we discovered the houses original wooden slats and they all needed to be prised off with a hammer.


Next up the walls needed to be boarded up with plaster board and then plastered. The ceiling was also lowered and painted at the same time and spot lights were installed. With the new walls came new skirting boards and a new door frame too. (All sounds pretty straight forward on paper, it's not when you are doing it.)


We gave the plaster a good few days to dry and while we waited we painted all the woodwork white. Noah's room was one of the rooms which I really struggled to decide what paint colour to choose. Graham and Brown offered to send us some paint and after gratefully accepting and browsing through their website we finally decided on a colour. We chose a gentle shade called Oakville. It's a gorgeous colour which seems to change colour drastically depending on the light and the time of day. In the mornings it looks like a light buttermilk shade but by night it looks more like a warm yellow. You can tell it's a great quality paint because even on plaster (which likes to drink paint) it covered and applied well and easy. We love the colour and it's made Noah's room look and feel very cosy.


Painting the room didn't take long and after the second coat we gave all the woodwork another coat too. The next step was to have the carpet fitted and that's is always the most exciting part because you know your room is almost complete! 


Noah's room is finished when it comes to renovating and decorating but it's not when it comes to dressing it. At the minute it's very minimalist when it comes to decor as all that is in there is his cot, wardrobe and some toys. We need to take his changing unit out of storage, put up his shelves and lots more. Once we are all settled and all the jobs throughout the house have been completed I will then be focusing more on home decor and will be blogging all about it too. 

We love how Noah's room has turned out and he must really love his new room too. After 4 months of exclusively sleeping and napping in bed with me he has moved into his cot, in his new room, in his new house without one single hiccup! Very proud Mummy!

What colour is your little one's nursery? Do you like the colour we chose? 

Upcycling with Rust-Oleum


I've been a busy body lately with the house renovation but I have also been keeping busy by upcycling old pieces of furniture. I wanted to spruce them up a bit so they fit in with the decor in the new house. 

When Rust-Oleum offered to send me a few bottles of their famous Painters Choice spray paints (which I was already a huge fan of) it couldn't of come at a better time as I had numerous projects which I wanted to begin. 

As we have pretty much finished our house renovation and have moved in I have been focusing a lot more on dressing the house rather than just the home improvement side and it's been ever so refreshing. 

Our bedroom was one of the first rooms we needed to set up and sort through as of course it's one of the most important rooms in the house. After we brought up the bed and dressed it I knew I had to dig out the shabby bedside tables that I had bought off ebay a few months back. 


They were an aged cream colour and I knew that I wanted to repaint them white to fit into the theme and decor of our bedroom. There are multiple Rust-Oleum shades to choose from but for this upcycling project I decided to use the Rust-Oleum Painters Choice in White with the Matt finish.  

I didn't want to spend hours sanding down both bedside tables so I invested in some easy surface prep which is basically a tacky liquid which coats whatever surface you wish to spray or repaint. After cleaning the tables I slathered them in the ESP, wiped away the excess and waited 2 hours for it to dry. It's a wonderful product because it eliminates any need to sand and provides the perfect surface to begin painting. 

Once the tables had dried I removed the drawers and took off the handles with a screwdriver as I didn't want them to get covered in paint. I then took both tables and both sets of drawers into a suitable environment to spray. I chose to do them in our garage but if it was a mild day with not much wind I would of sprayed them outside. 


It was then time to start spraying! If you are new to spray paints then I would recommend you have a few tester sprays on some cardboard first. I didn't do that first off and I ended up spraying to close and it created big drip marks. It is also vital that you shake the Rust-Oleum for a good minute or two before you begin to use as this makes sure all the paint is evenly mixed. When applying I held the can back around 30cm as it coats more evenly and there's less of applying too much and creating drip marks or making mistakes like spray marks. 


Less is really more when it comes to spray painting furniture. Apply a little and gradually build as you go. I like to apply in a sweeping motion as I find I achieve the best results. If you take your time with it and remember to shake and hold back the can you can achieve a flawless finish. 

It took me less than 30 minutes to spray the bedside tables which is invaluable when you have many projects to do and not much time on your hands. Rust-Oleum can be a little pricer than a regular can of paint when you are planning on painting numerous pieces but it makes upcycling so much easier. So much easier that I wouldn't hand paint a piece of furniture ever again! 


Our home: Bathroom update

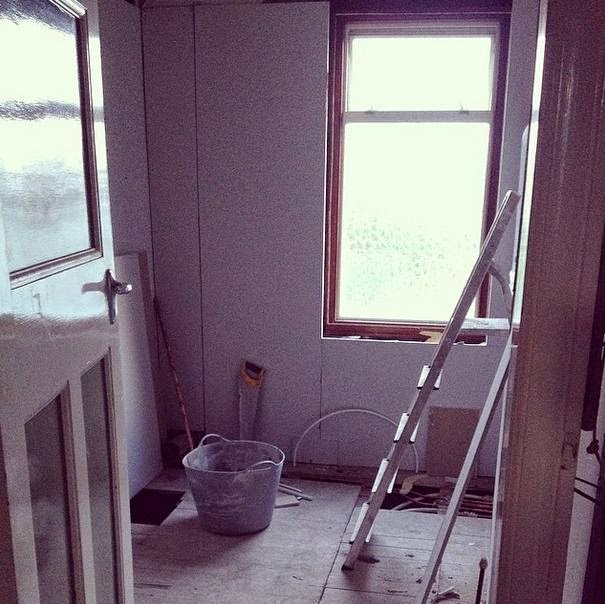
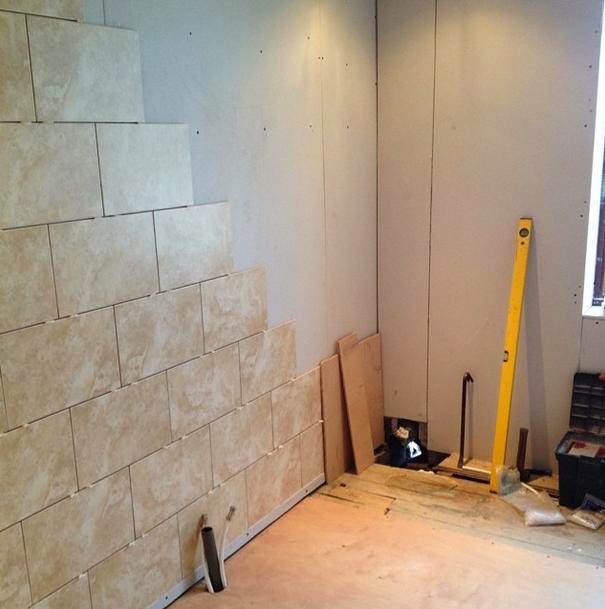
As I said in my previous post I still cannot believe we are still waiting to get into our house. It's been a slow process but we are getting there slowly but surely. It's been two months since I last updated you on our progress in the bathroom so it's time to post where we are with it now.

I'm so happy with how the bathroom has turned out, the transformation is incredible. From the outdated, rundown green space to a neutral, on-trend one. We have a four-piece bathroom with a tower radiator. We have some glass cabinets that are yet to go up too. We are also having a cupboard built around the boiler which won't just hide the boiler but there will be shelves in there too for storage. As mentioned on Boiler Brain, there are boilers designed specifically to fit in small spaces such as kitchen cupboards, so that's also always an option. It's just odd bits of jobs here and there that need to be done such as grouting, tiling in the bath, a bit of paint here and there! It's all about those loose ends now but soon there will be 3 rooms that are fully completed! So exciting!